H2 Product Unboxing Guide
The following video will assist you in installing the MOCREO Hub (H2).
You can watch this video to learn how to deploy H2 quickly.
Installation and Setup
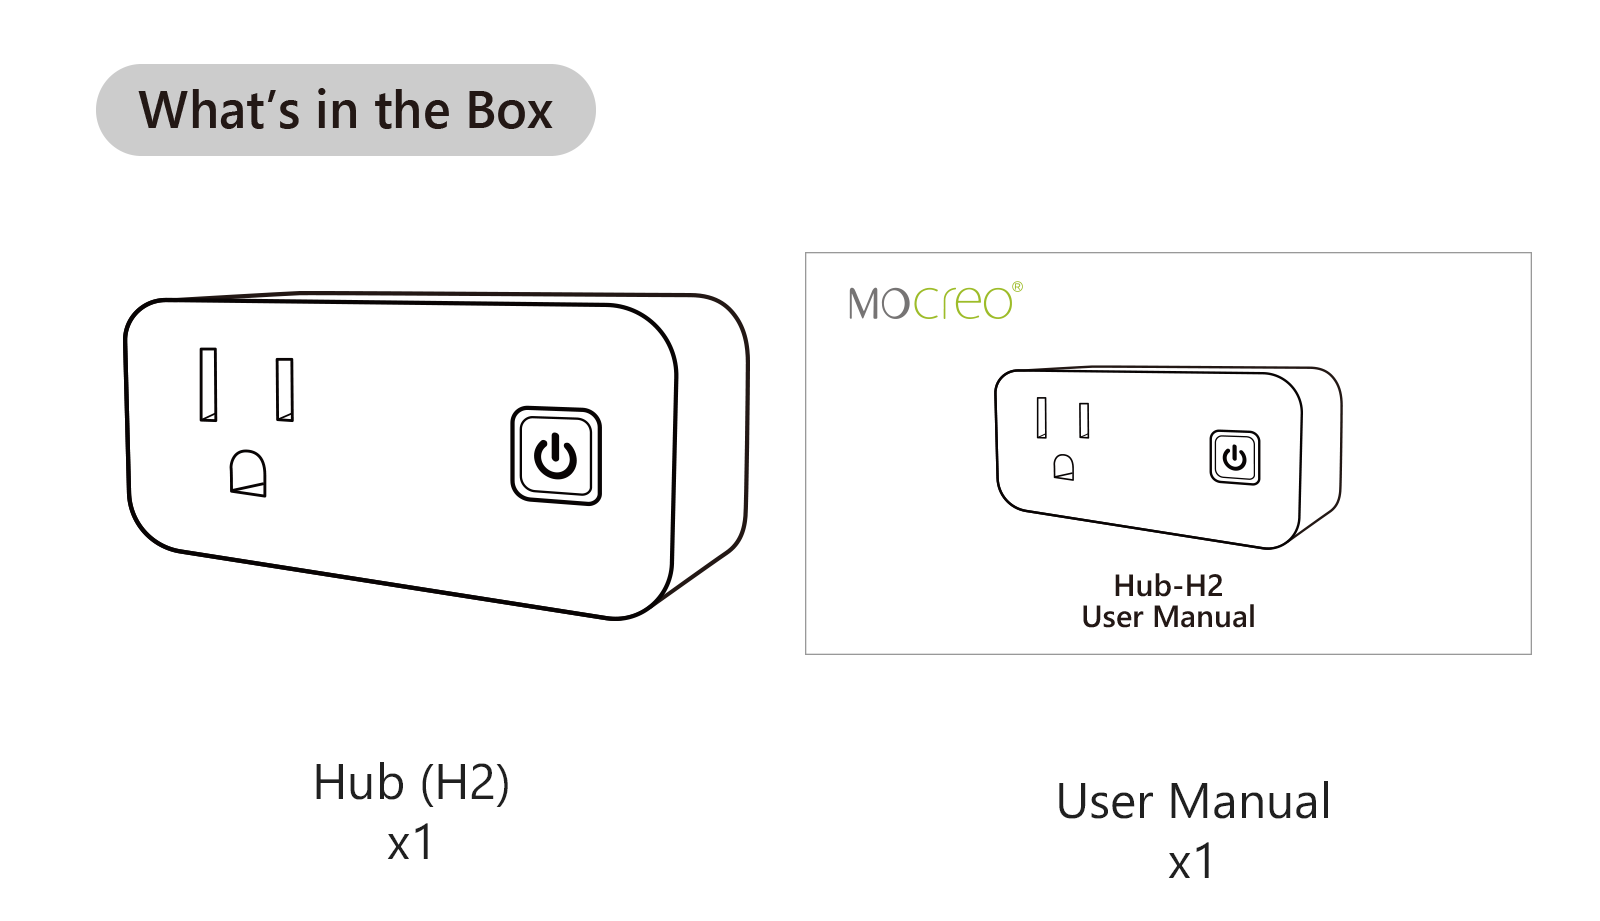
Step 1: Verify the Completeness of All Items
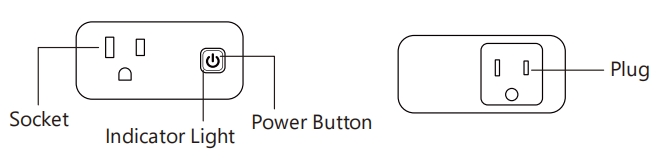
At a Glance
What’s in the Box
Prior to unpacking, please ensure the integrity of labels and seals on the packaging to ensure that you have received an undamaged product.
Upon opening the package, check the contents list to ensure that you have received all the necessary accessories. If any items are missing or damaged, please contact us at https://mocreo.com/service.
Step 2: Download the MOCREO Application and Create an Account
Search for “MOCREO Sensor” on Google Play/App Store or scan the QR code below to download the MOCREO Sensor application.

Open the MOCREO application and click “Create Account” to register a new account. Please ensure that you enter the correct email and password formats.
If you haven’t received the confirmation email, click “Resend” for troubleshooting.
Step 3: Familiarize Yourself with H2 Indicator Light States and Their Meanings
Indicator Light |
Status of Hub |
|---|---|
Purple Breathing Light |
Normal Working Condition |
Blue Breathing Light |
The Hub Is in Setup Mode |
Red Breathing Light |
Hub Is Not Connected to Wi-Fi |
Red Flashing Light |
An Alarm Event Is Triggered |
Step 4: Installation
Device Deployment
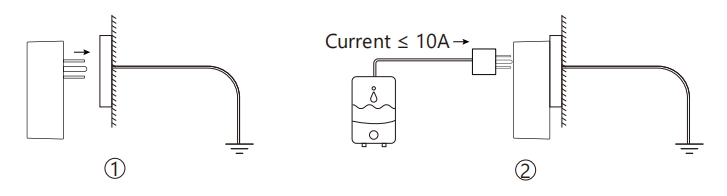
Plug the H2 into a power outlet to start it up. It is recommended to install the H2 in a high, unobstructed location to ensure stable signal transmission between the Hub and the sensors.
The outlets on the Hub can be used to power other devices, but be cautious not to overload it. The maximum output current supported by the outlet is 10A.
Setup
Open the MOCREO Sensor app and log in to your MOCREO account. Click the [+] button on the top right of the MOCREO homepage to add the Hub.
Note: The H2 Hub supports Wi-Fi connection only.
Press and hold the Hub’s power button for 5 seconds until the Hub’s indicator light turns blue, indicating that it has entered Setup mode.
Enter the SSID and password of the Wi-Fi network you wish to connect to. When “Congrats! Hub setup successfully!” appears on the page, it means the Hub is successfully added.
Note: Currently, the H2 only supports the connection to 2.4GHz Wi-Fi networks.
FAQ
Hub Offline/Unable to Connect to the Internet
Check the online status of the Hub. Open the app and click [Menu], then click [Hubs] to view the color of the Hub card.
If the Hub card is gray, it indicates that the Hub is offline.
If the Hub card is green, it indicates that the Hub is online.
Check if the Hub indicator light is on. If not, ensure that the device is properly connected and powered on. If the indicator light is red, the current network connection is either disconnected or abnormal. You can try removing the power device from the Hub, deploy the Hub closer to the router, and add the Hub through the app again to bring the Hub online, or unplug and reinsert the Hub into the socket for a power cycle to restore Hub connectivity.
What should I do if I encounter the error “Connect the device to Wi-Fi Ap” while adding the Hub?
Check if the Wi-Fi password is entered correctly.
Check if the router has a fixed device connection limit and is unable to add new devices.
Check if the current Wi-Fi encryption mode is WPA/WPA2, WPA3/WPA2-Personal, WPA3/WPA2-Enterprise, or open mode.
What should I do if I encounter the error “Awaiting device to sync information” while adding the Hub?
Click “Retry”.
Exit the application (Close background running) and then relaunch the application.