ST7-CL Product Unboxing Guide
How to install: ST7-CL Temperature Sensors Kit
Step 1. Check that all items are complete
Before opening the package, check the integrity of the labels and seals on the package to ensure that you have not received a damaged product.
Open the package and please check the contents list to make sure you have received all necessary accessories. If there are any items are missing or damaged, please contact us(https://mocreo.com/service) .
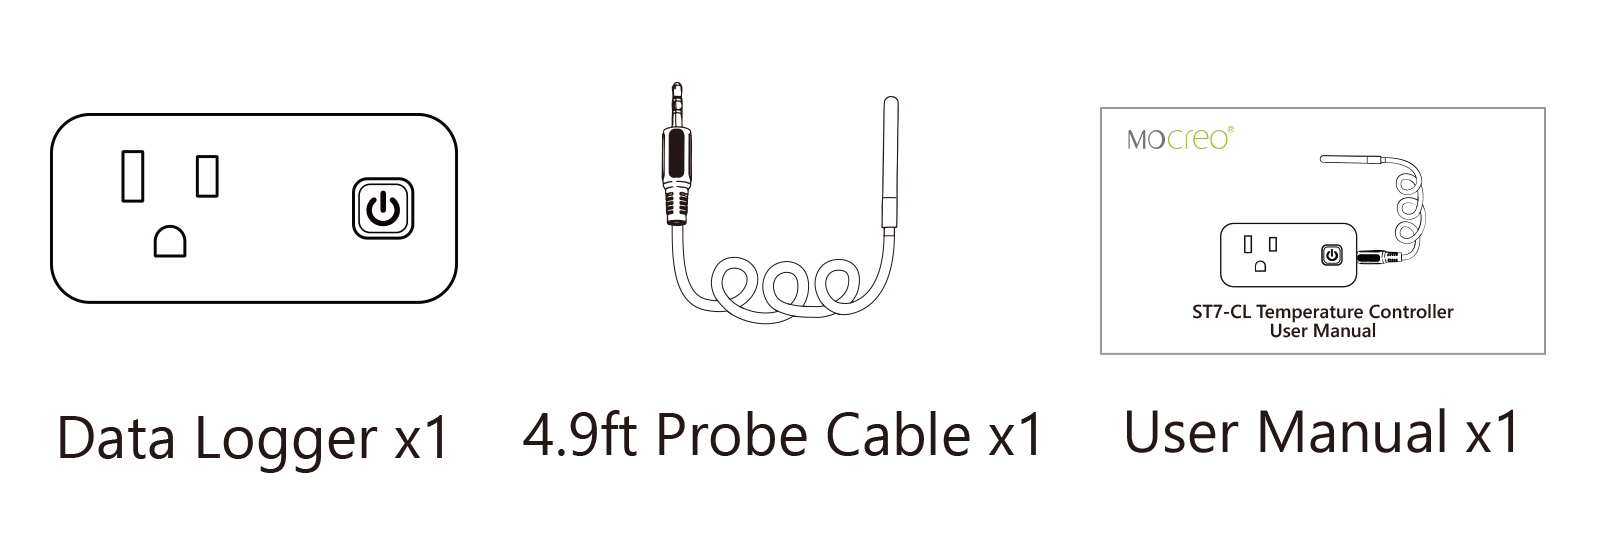
Before starting the installation, check the contents list to make sure you have received all necessary accessories. Please contact us(https://mocreo.com/service) if any items are missing or damaged.
Step 2. Download the MOCREO App and register an account
Search “MOCREO Sensor” on Google Play/App Store or scan the QR code below to download the MOCREO Sensor App.

Open MOCREO App and click “Create Account” to register a new account, please pay attention to entering the correct email format and password format.
If you have not received the confirmation email in your email, please click to check for troubleshooting.
Step 3.Connect ST7-CL Temperature Sensor
Before adding and using a MOCREO device, you need to make sure that you have granted the necessary permissions to the MOCREO Sensor App, which can be found by clicking on Permissions .
Insert the external temperature probe firmly into the ST7-CL thermostatic control sensor.
Plug the ST7-CL thermostatic control sensor into the power socket to complete the product power supply.
Open the MOCREO Sensor APP, click the “+” button in the upper right corner, select “Socket”,select the “Temp Controller - ST7-CL”, and add it.
Follow the APP prompts, press and hold the ST7-CL switch button for 5 seconds to enter the Setup mode, select the constant temperature control sensor ST7-CL in the MOCREO Sensor APP, and complete the addition. (The switch button indicator light continues to flash blue)
Some configurations and reminders about ST7-CL Sensor
You can find the following functions on the ST7-CL details page:
Current Outlet Status: Indicates the current power status of the ST7-CL outlet.
Locate the Device: The selected device will beep three times.
Snooze the Alarm: Without disabling the ST7-CL alarm function, the ST7-CL stops alarming this time and has no impact on other functions.
You can find the following functions on the ST7-CL settings page:
Working Mode:Select the corresponding working mode according to different application scenarios.
Heating Mode:When the temperature is lower than the set value, the device power is turned on; when the temperature is higher than the set value, the device power is turned off.
Cooling Mode:When the temperature is lower than the set value, the device power is turned off; when the temperature is higher than the set value, the device power is turned on.
Taking Heating Mode as an example, if the temperature is below 40℉, the ST7-CL socket power is on; the current temperature is above 115℉, the ST7-CL socket power is off; and if the temperature is between 40℉-115℉, then The ST7-CL power socket status remains unchanged from the previous status.
Buzzer:When enabled, the device will beep every second if the temperature exceeds the threshold range. Note that the beep will continue until the monitored temperature returns to the set threshold range or this option is turned off.
Other functions of ST7-CL button:
When the current device is in normal working condition, short press the power switch button to manually control the power socket switch (on/off).
When the device is in alarm status and beeps, short press the power button to temporarily stop the beep. (A short press again will control the power outlet switch)
Press and hold the power button for about 15 seconds until the indicator light changes from constant to flashing and then release. The device will be restored to factory settings and all historical configurations will be reset.